Three days in Tokyo for a photographer is enough to come home with images you're genuinely satisfied with, if you know where to put those three days. It is not enough to cover the city. Tokyo is enormous and photographically dense in a way that becomes obvious on day one — there are whole neighborhoods worth a week each, and you're going to miss most of them. The goal with three days isn't coverage. It's depth in the right places. Here's how I'd structure it, based on four years of shooting here.
Where to Stay
If you're optimizing for photography, stay in Shinjuku. Not because it's the most charming neighborhood — it isn't — but because it puts you within walking distance of the most photographically productive area of the city, and it has the densest concentration of accommodation options at every price point. The east exit side of Shinjuku Station is where the action is at night; a hotel within ten minutes of that on foot means you can go out after midnight without thinking about trains or taxis. Search hotels near Shinjuku on Booking.com — the area around Kabukichō and the east exit has options from business hotels under ¥8,000 a night to larger chain properties with decent room sizes.
If Shinjuku is full or over budget, Shibuya is the second-best base for the same reasons. Both put you on the Yamanote Line with easy access to Akihabara, Asakusa, and anywhere else this itinerary sends you.
Day One: Shinjuku at Night
Arrive in the afternoon, drop your bags, and don't pick up the camera yet. Walk the route you're going to shoot later. Learn where the Kabukichō entrance is from the station, where the main street splits, where the back alleys start. This reconnaissance hour is worth more than it sounds — when you come back at 9pm with a camera, you'll move faster and make better decisions because you already know the space.
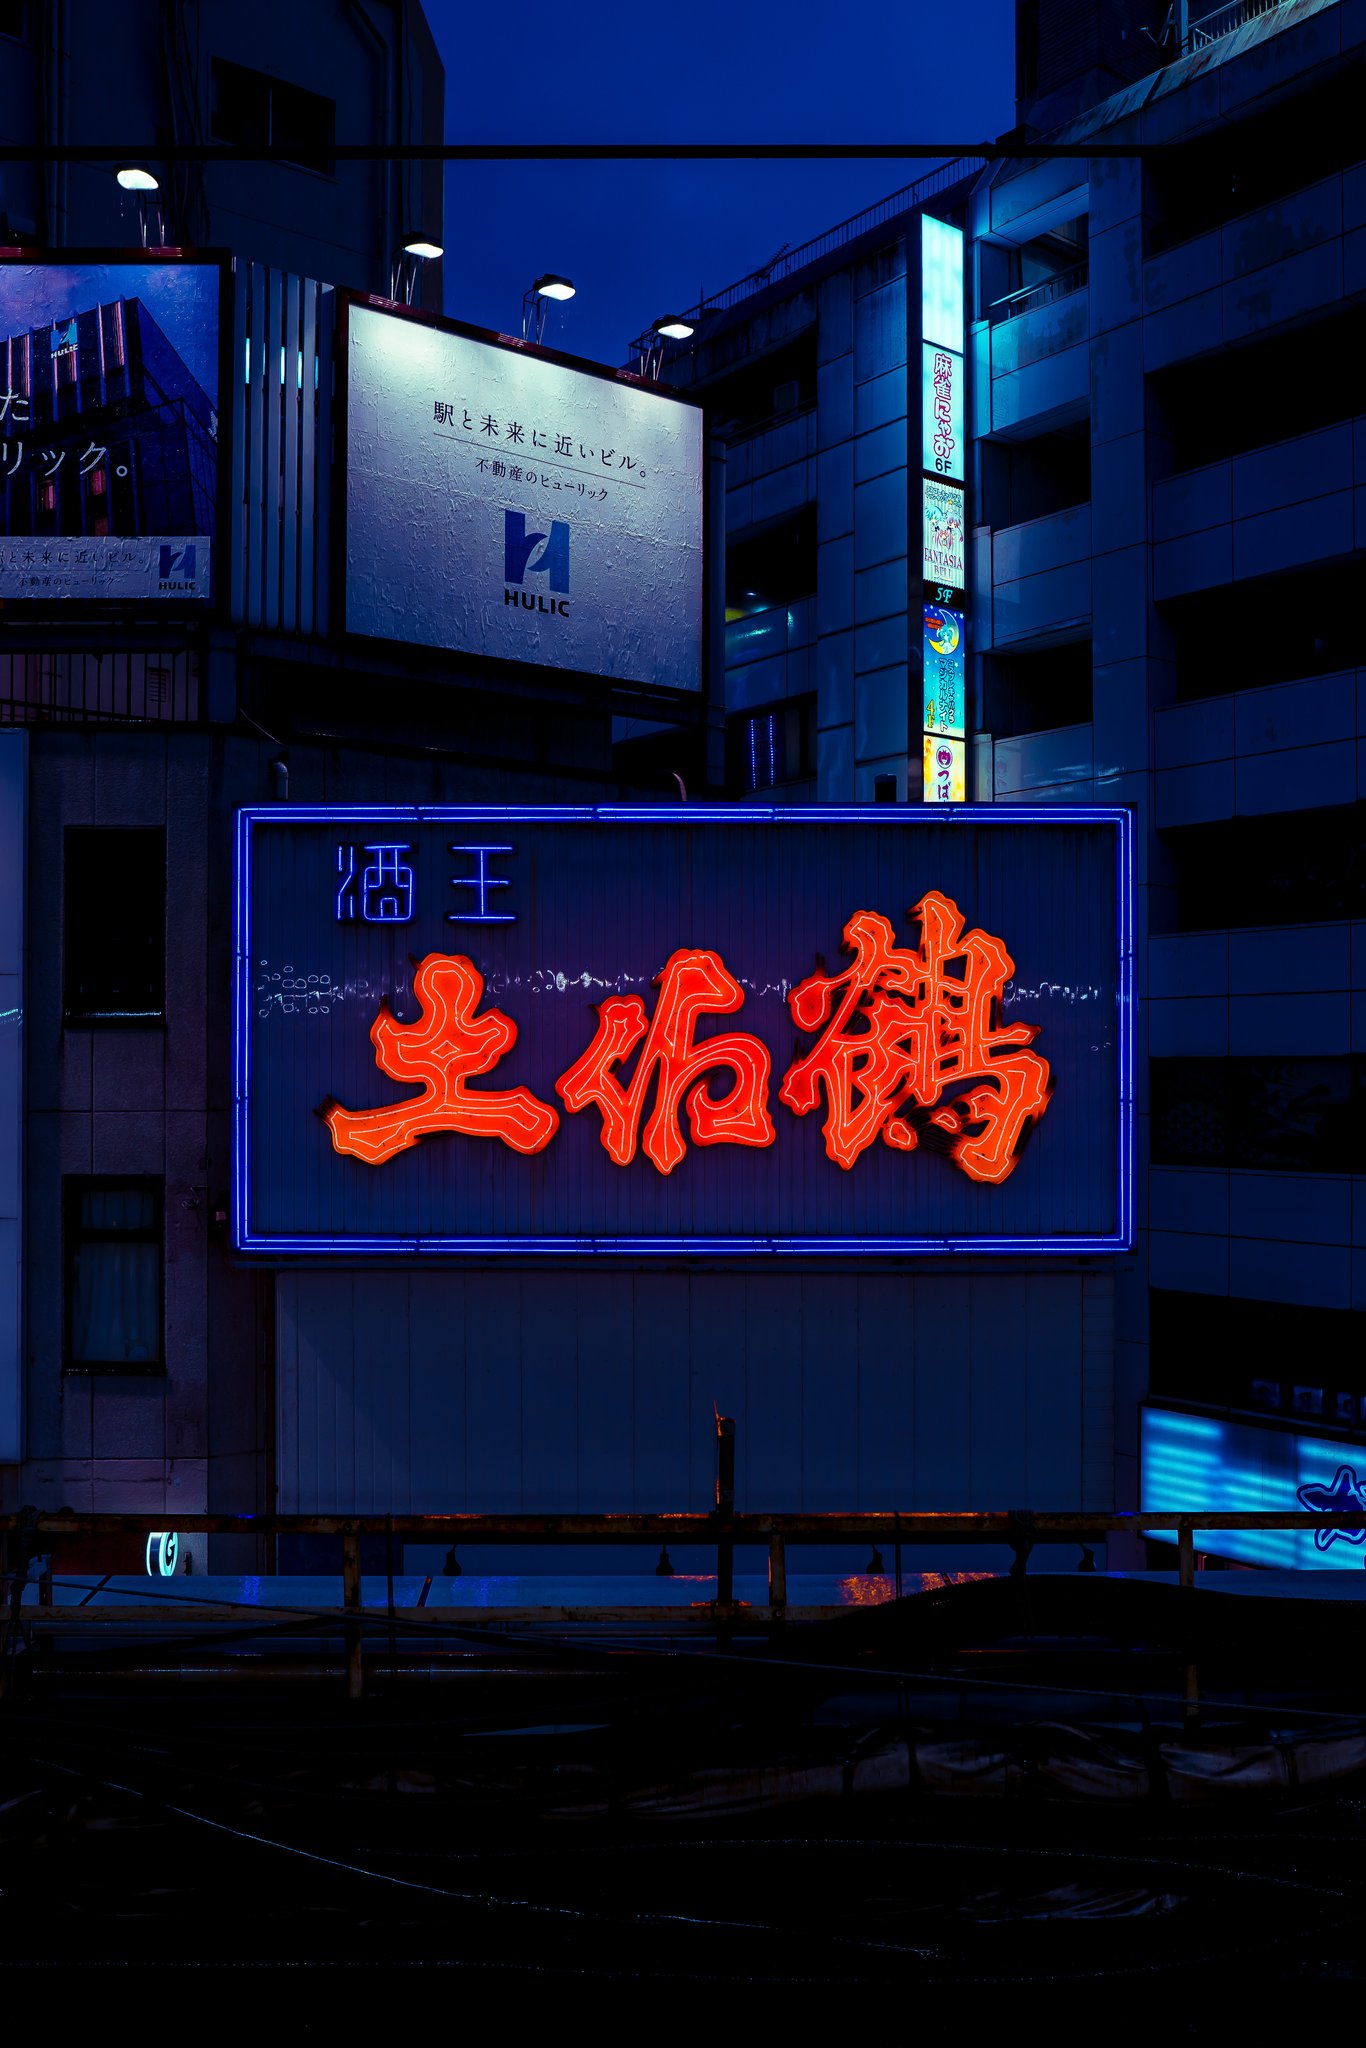
Come back at blue hour, roughly 30 to 60 minutes after sunset depending on the season. This is the window where the sky still holds color against the neon. The crossing near Kabukichō, the Shinjuku Golden Gai alley network, the stretch running south toward Omoide Yokochō — these are the three areas I'd prioritize on night one. Read the full Shinjuku guide before you go — it covers the specific spots and timings in more detail than I can here.
If it rains on day one, that's good news. Wet streets at night in Shinjuku are some of the best light Tokyo produces. Don't reschedule. Go.
Day Two: Shibuya, Then Akihabara
Split the second day between two neighborhoods with different visual registers. Shibuya in the evening, Akihabara late at night.
Arrive in Shibuya at blue hour, same logic as the night before. The Scramble crossing is worth shooting once — get it early, get it done, then move into the side streets where the actual work is. Dogenzaka, the back streets behind 109, the narrow alleys threading west of the station — this is where Shibuya photography stops looking like every Shibuya photograph you've already seen. Give it two hours and then eat somewhere in the area before moving on. There are good ramen spots near the south exit and standing sushi bars throughout the neighborhood.
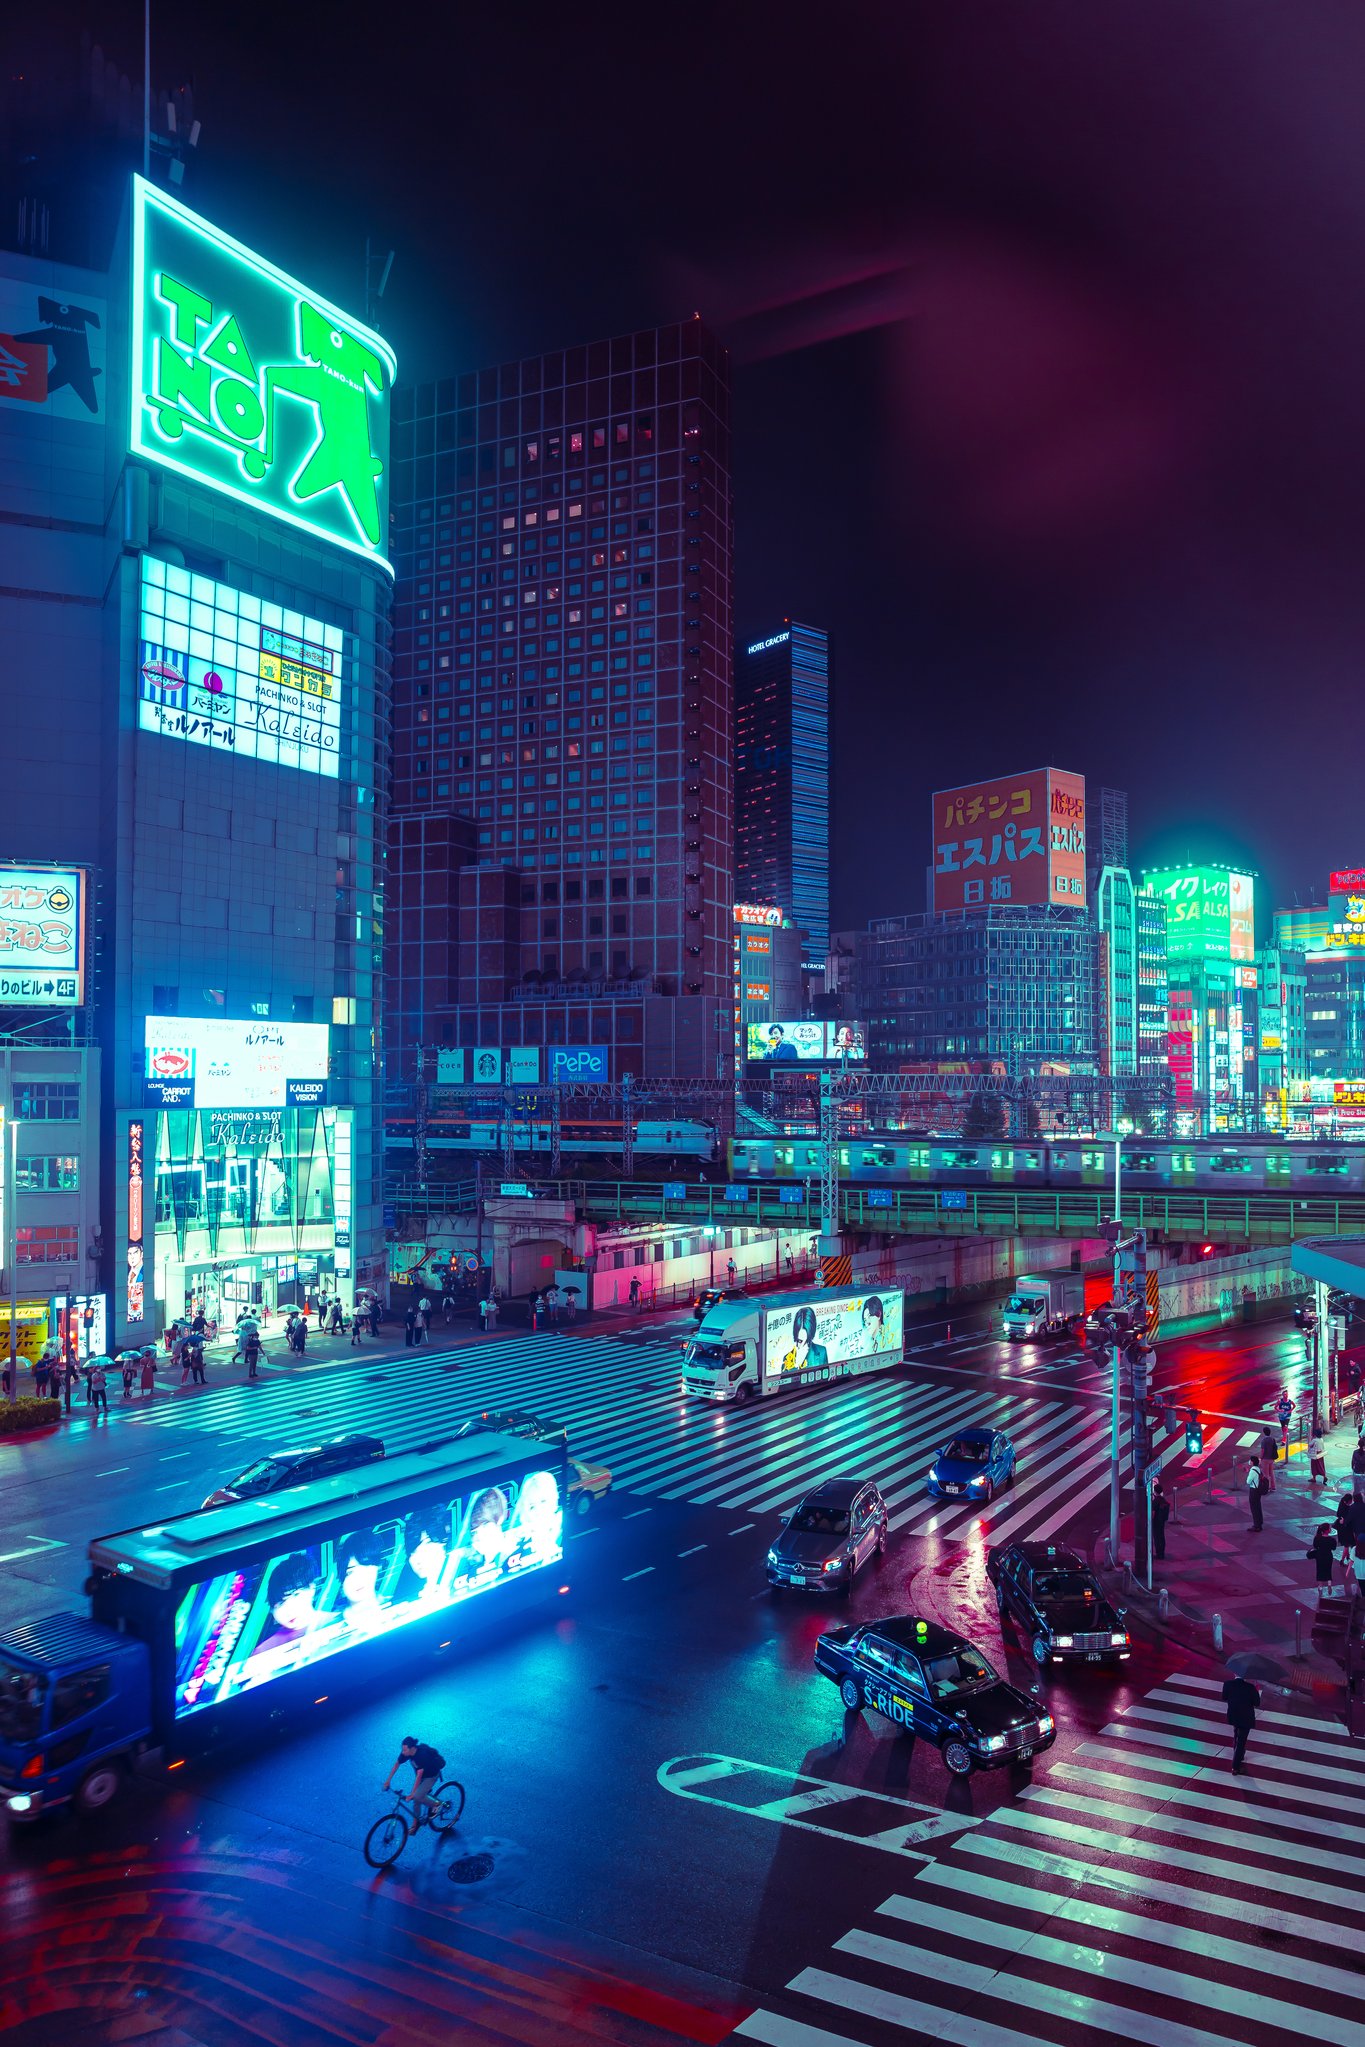
Move to Akihabara after 9pm. The neighborhood doesn't really start until the big electronics stores close and the neon stops competing with daylight. After dark, the density of sign light in Akihabara is unlike anywhere else in Tokyo — brighter, more chaotic, more concentrated than Shinjuku. Bring a wider lens if you have one. The main strip running from the station to Suehirocho is the obvious route; the streets threading east of it are where the stranger and more interesting material lives.
Day Three: Asakusa, Then Wherever the City Takes You
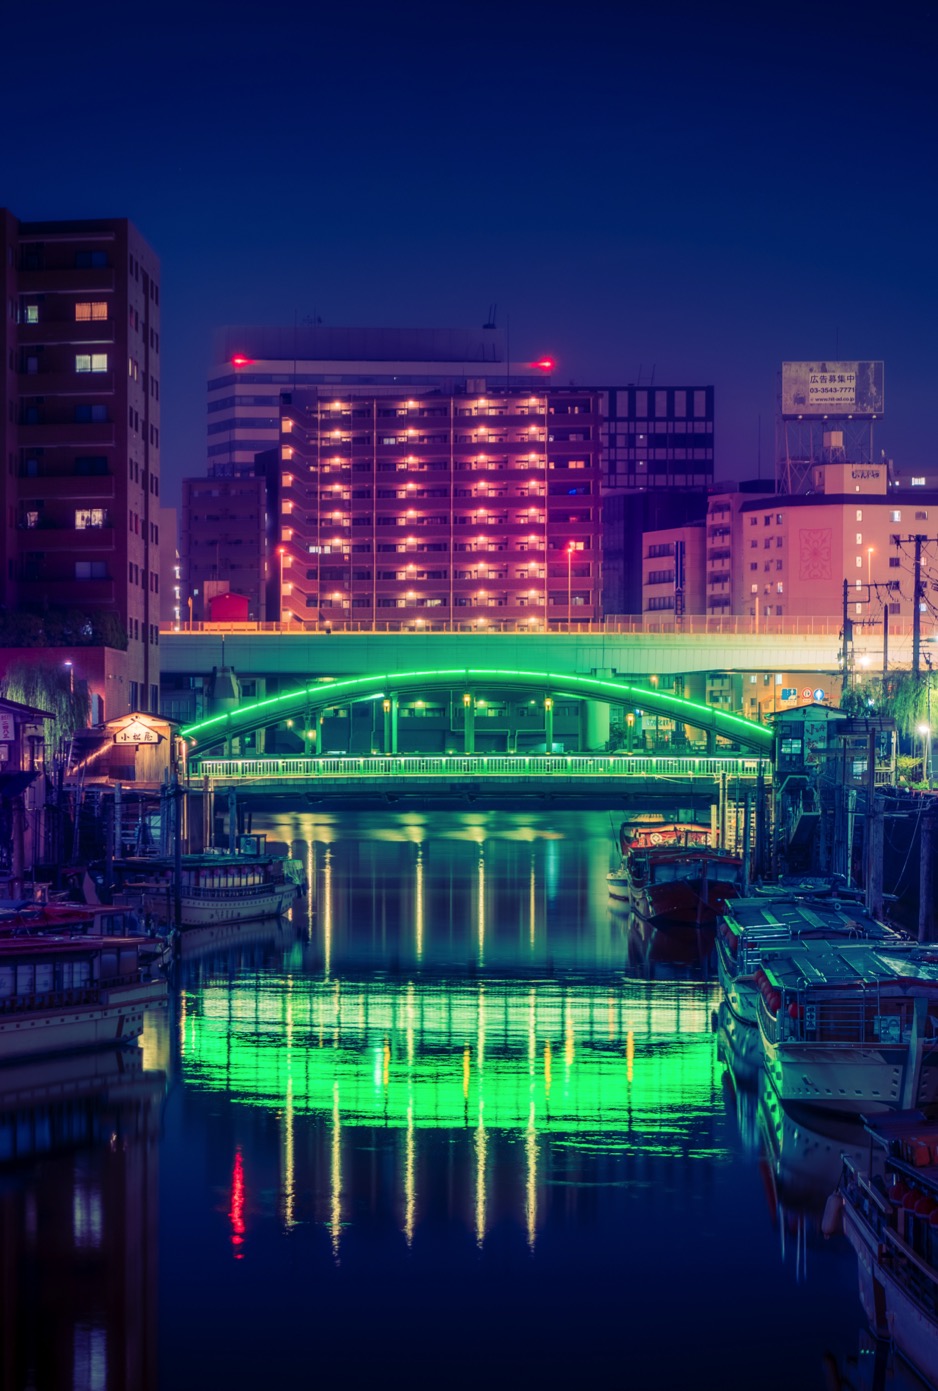
Start day three differently. Asakusa in the early morning — before the tourist buses arrive — is one of the quieter and more atmospheric corners of Tokyo. The Senso-ji complex at 6am has a completely different character from its afternoon self. Lantern light, incense smoke, almost no crowds. Bring the 50mm and work slowly. This is the contrast to the previous two nights — older Tokyo, quieter light, less neon.
After Asakusa, the day is yours. If you haven't been to Shimokitazawa, it's worth an hour — a neighborhood of used clothing shops, underground live music venues, and back alleys that look nothing like the rest of the city. If you want to extend the Akihabara work from the night before, Ueno and the streets connecting the two neighborhoods have their own character during the day. If the weather turns and it rains, go back to Shinjuku or Shibuya and shoot wet streets again — you'll get different results than night one because you know the spaces better now.
Practical Notes
Get a Suica card at the airport or at any major station. It works on every train, subway, and bus in Tokyo and at most convenience stores. Put ¥5,000 on it to start and reload as needed. Don't buy a day pass unless you're doing an unusual amount of cross-city travel — most itineraries like this one are concentrated enough that per-ride fares work out cheaper.
The last train from most neighborhoods leaves between midnight and 1am depending on the line. After that, you're taking a taxi or walking. Taxis in Tokyo are expensive but reliable — a ride from Akihabara to a Shinjuku hotel is roughly ¥2,000–¥3,000. If you want to shoot past last train, factor that into your budget or plan to walk. I've walked from Akihabara to Shinjuku at 3am more times than I can count. It takes about an hour and you'll find things to photograph on the way.
Eat when the opportunity presents itself, not when you're hungry. The best places in Tokyo often have lines at peak dinner times and no line at 10:30pm. Family restaurant chains — Jonathan's, Denny's, Gusto — are underrated for a late-night reset between shoots. Unlimited drink bar, decent food, no pressure to leave. They're open until 2am or 24 hours and they're everywhere. Don't be embarrassed to use them.
What to Do If It Rains the Whole Trip
Shoot it anyway. Every neighborhood in this itinerary is better in rain than in clear weather, for the same reason: Tokyo's street-level neon reflects off wet pavement in a way that turns ordinary scenes cinematic. I've had three-day trips where it rained every night and those ended up being the trips with the best images. Check the weather, dress for it, get a cheap umbrella from a 7-Eleven, and go out.
Want a private photography session while you're in Tokyo?
Book a Session in Tokyo →